

Presented by…

There are a lot of stories about the dream catcher, many of which accompany the dream catchers that we can buy in the stores. The most common thread among all of the dream catcher stories, is that the dream catcher should be hung in the room in which we sleep: above the bed, on the door, on a window, or as we choose.
|
The other constant is that the dream catcher is to catch our dreams. Some believe that the dream catcher catches bad dreams, before they can come to us, thus preventing nightmares. Another belief is that the dream catcher saves our dreams, or catches the demons as they leave so that we may rid ourselves of the demons before they return.
There are many dream catcher beliefs, some of which are opposite in nature. When we are considering using, or making a dream catcher, we can decide at that point what we wish our dream catcher to be used for.
We can hang dream catchers any where that we feel is right for us.


Making a Dream Catcher takes some time to perfect. However, when we have made our first Dream Catcher by hand, our efforts will feel worthwhile.
We should not expect our first Dream Catcher to be perfect.
We can expect to:
|
|
loose tension, |
|
have the leather cording and the waxed thread snap and break |
|
|
have our dream catcher end up un-even. |

We need:
|
|
A solid hoop. it is best to start with a hoop that is approx. a foot (30cm) in diameter so that we have plenty of room to move about. Alternatively, we may wish to use a flexible twig which we can bend into a circle, as an all natural foundation to our Dream Catcher. |
|
|
Two packages of waxed thread. We may use twine, leather cording, silk, fishing line, cotton, or any similar material. |
|
|
Leather stripping. We will use at least two feet of stripping for our first Dream Catcher, and we may encounter breakage so it may be cheaper buy in bulk. |
|
|
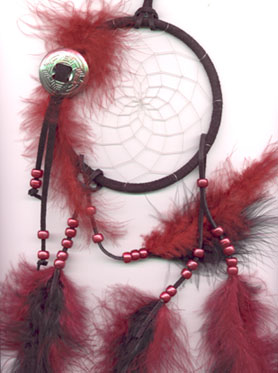
Decoration. If we plan to decorate our Dream Catcher, we may need to acquire some beads, and feathers. Our Dream Catcher is plain. |

Method.
|
|
We begin by wrapping the leather strips all the way around our hoop. We do not tie the leather wrapping down with the leather, instead we use the waxed thread (or substitute). We tie one knot on the first wrap, and another knot when we have completed the circle. |
|
|
We tie the end of the waxed thread (or substitute) around the hoop where we tied the last piece of leather wrapping. |
|
|
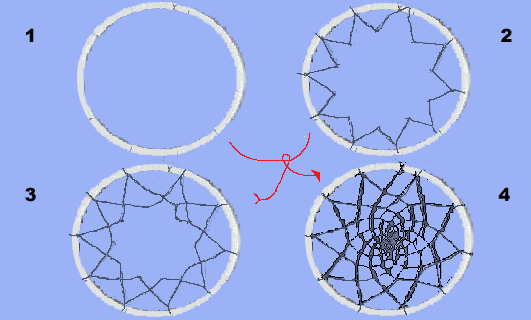
We begin to spiral our thread around the hoop leaving about two inches of thread between each wrap. We should have approximately 13 peaks when we complete our first round. |
|
|
Now going in the center of the first space which we left (on the thread), spiral again. We must make sure that we pull the thread taught each time. |


|
|
We continue this until we feel that the pattern is complete. If we are closing the pattern in the center, when the spaces get too small to work with our fingers, we can begin using a needle with the thread. |
|
|
We tie the thread in a knot, and cut off the remainder. |
|
|
We can add decoration at this point if we choose, or whilst we are creating our pattern. |


| Navigation & Site Map | How to ... | What's New & Updated |
 |
||
|
Copyright permission is seldom withheld. |
||